5 Methods for Making Masterful Mixes
Cut your next tune on your home machinery using these practical pointers

When it comes to cutting a new tune on your home machinery, laying down the various elements in multitrack is only half the battle — in many respects, the most crucial part of the job is the manner in which you stitch everything together during the mix phase. Is the vocal good and present? Are the instruments properly equalized and well-balanced? Most of all, does the entire track sound smooth and natural, or does it bear the telltale “pumping” of an overextended compressor?
To that end, here are five practical pointers that will help you create a masterful master mix the next time out.
Compression Suggestions
It’s amazing how easy it is to ruin a slaved-over rhythm track by topping it off with a badly recorded lead vocal. Luckily, there are a number of ways for you to avoid this predicament.
When cutting vocals, most of us are prone to accentuating certain words or phrases, resulting in unintended bursts of volume. Inserting a compressor-limiter into the signal chain can help address these and other issues, while also adding clarity to the recorded vocal—provided you use it correctly.
Start with the right compression “ratio”—i.e., the amount of compression added per decibel of untreated signal. Ratios can vary from a basic 2:1 to 10:1 or higher (commonly known as “limiting”). The “threshold” level is the point at which the compressor comes on; the “attack” controls how quickly the compression effect starts, while the “release” determines the length of the effect. Setting the compressor to a moderate 2:1 ratio allows the unit to act as a leveler rather than a processor, regulating the overall volume without coloring the sound—the compressor does its job, without making you aware that it’s doing its job. This ratio is also suitable when using the compressor in the stereo mix output—just enough to keep the combined signals in check while also adding “punch” to the overall sound.
Stereo Experiments
Good stereo placement is also key to achieving a good vocal sound. For instance, if you have rhythm guitars or other instruments stacked directly “behind” the lead vocal in the center position, panning them left and/or right will help widen the path for the vocals. For that matter, you could do just the opposite—though it may not be standard practice, I’ve had pretty good luck recording a double-tracked lead vocal, then placing each part far left and right (perhaps with a touch of delay or reverb). Nor are you required to keep the vocal in one location for the duration of the track—you could start by placing it in the center, then move it left or right or split it in stereo (assuming it’s double-tracked) during the bridge, and so on. Experiment with a number of different scenarios until you find one that works.
Nothing buries a vocal faster than an overstuffed backing track. Therefore when mixing, use your faders judiciously, focusing on the main elements (rhythm guitar/keyboard, bass, drums/percussion), bringing additional instrumentation in and out of the mix in order to create the right sonic contrasts—say, at the start and end of a bridge or chorus—while also leaving extra space for the vocals.
EQ to the Rescue
When it comes to having vocals “sit in the mix” correctly, a few minor EQ adjustments can go a long way. For instance, if your track is laden with low-end—lots of boom-y acoustic guitars, loud basses—you may have a harder time hearing the vocals clearly. Using your channel EQs, you can create distinctive “frequency paths” for each instrument—try gradually slicing some of the bottom off the bass and guitars while simultaneously boosting the mids on the vocals until the parts seem well defined and don’t clash with one another in the mix.
Yet another way to avoid potential sonic conflicts involves using the right mic for the job. Though large-diaphragm condenser microphones are more sensitive and fuller-sounding, many engineers prefer using a good quality dynamic mic such as an Electro Voice RE-20 or Sennheiser MD-421, which can provide a nice direct vocal sound void of the heavy bass tonality commonly associated with studio condensers.
How Hot?
When cutting tracks or making your master mix, the big question is: how much loudness is allowed? A lot depends on the medium you’re using. For all its attributes, the average DAW can only tolerate so much level; push the signal above the 0dB mark for any length of time and you’re likely to cover your tracks with a horrific crackling noise known as digital “clipping.”
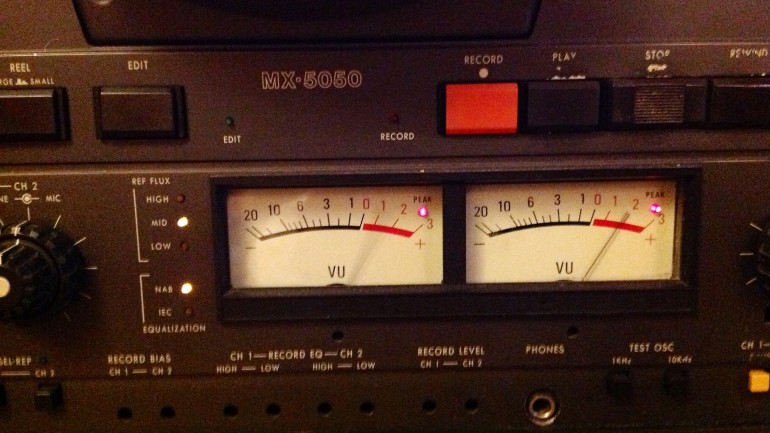
This may help explain the ongoing fascination with analog tape machinery. Though big and bulky and requiring constant care, many of these decades-old relics are nevertheless capable of producing extraordinary results—“foundation” instruments such as drums and bass sound particularly good when cut to tape (generally speaking, the faster the speed, the better the fidelity—i.e., at least 15 inches per second).
But the best part about using tape for tracking or mastering is the ability to set the levels significantly higher than you would on a digital unit. That’s because tape has actual “headroom”—as much as 10-15dB above “acceptable” levels. Even at the highest peaks, there exists a unique phenomenon whereby signals “in the red” actually compress rather than distort, the result of maximizing the “saturation” level of the tape. This is particularly handy if you’re working without a helper—when recording a guitar part in a separate room, for instance, I can simply push the channel faders on the mixer all the way up beforehand, knowing that the ½-inch tape can handle it.
Though digital is far more convenient and reliable, an arrangement that includes both digital and analog apparatus working together is certainly worth considering. If you’re happy with your digital set-up but want to avoid the terrors of digi-distortion, always be sure to keep the master levels out of the red zone (a little yellow here and there is okay); when tracking, set the channel gain knobs no higher than the center position.
Rip it Good
With online opportunities growing in number, getting your finished product to the fan base without sacrificing sound quality is obviously a major consideration. Converting two-track WAV masters into lossless audio formats such as FLAC, AAC or ALAC gives you the best all-around sound but occupies significantly more space and Internet bandwidth; though an MP3 ripped at a heavily compressed 128 kpbs will download in seconds, the resulting audio may leave something to be desired.
When ripping files then, try several different compression formats; a good halfway point is still 192 kbps, which offers decent-enough MP3 audio in a package still manageable enough for most users; even better is 320kbps, about as close to WAV-quality as you can get in an MP3 setting (I, for one, can’t hear the difference).


Community
Connect with BMI & Professional Songwriters