Really Good Guitar Sounds, Simplified
Some tools and tips for both electric and acoustic recording, from miking alternatives to selecting the “right” axe for the job

A small tube amp, the right room, a good signal chain – these are just some of the ingredients for getting inspired guitar tracks without a whole lot of fuss (or funds). Yes, having a really fine instrument will certainly boost your chances of getting really luscious results, but if there aren’t any high-end Martins or Gibsons in your closet, not to worry. Here we’ll explore a few tools and tips covering electric and acoustic recording, including miking techniques, microphone types, as well as knowing which guitar is best suited for the work at hand—be it a D-45 or a no-name knock-off.
Choose your tools
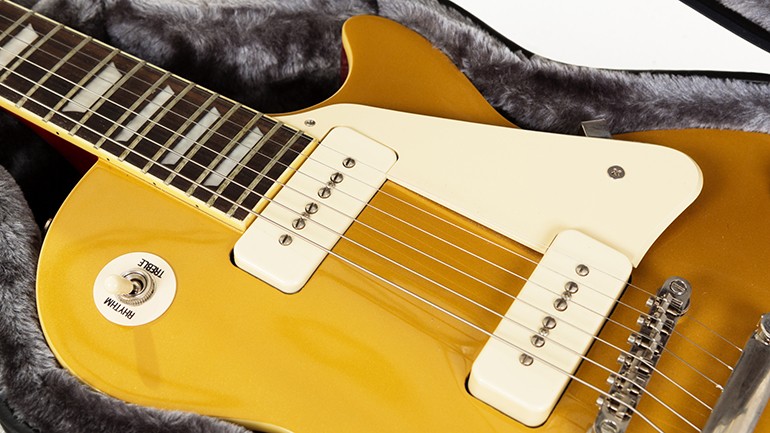
As you’ve probably noticed, different guitars can produce a wide range of tonal shades. With electrics, a key differentiator is the type of pickups used, as well as their relative strength. Single-coil pickups typically offer a cleaner, brighter sound, making guitars such as the Fender Telecaster a mainstay among country and pop, while the much-hotter humbucking variety found in Gibson Les Paul models, for example, might be preferable when seeking a meatier rhythm or lead sound. While modern effects processers attempt to emulate any number of makes no matter what you’re using, if you have access to the “right” guitar for the job at hand, all the better. The same goes for acoustic guitars, which tend to produce tones based on criteria such as body size and woods used—whereas standard or jumbo dreadnaughts with rosewood back & sides typically have more bass definition and volume, guitars that are made from mahogany or are slightly smaller often make a better choice for background or rhythm playing.
Not quite sure how it should sound? In my experience, experimentation often dictates the ultimate outcome. Track a number of takes, using different guitars/guitar tones, chord voicings, mic positioning, and so on, then bring up various combinations on your faders until you find the right “feel.”
Cut it right
If you’re fortunate to own a well-made instrument, be sure to brush up on your miking skills to ensure the best recorded sound possible. One widely used approach for electric guitar is to place a basic dynamic microphone only a few inches away from the amplifier’s speaker cone, then gradually adjust the angle of the mic until you achieve the desired tone. Generally speaking, the closer you are to the middle of the speaker, the brighter the overall sound. In most instances you’ll want to start slightly off center, then incrementally move the mic towards the edge of the speaker. You may find that guitars with more high-end tend to sound best when situating the mic at an angle (or “off-axis”).
If you prefer a bit more weight, you could try two mics, perhaps centering one while keeping the other towards the speaker’s edge. Or for an ambient sound, you might suspend a condenser microphone several feet back and slightly elevated, then blend the signal with the up-close mic, either together or in stereo. When doing so, be sure the two mics are “in-phase”—in other words, if their polarities don’t match, one mic could effectively cancel out the other. If the combined signal seems thin, try reversing the polarity on just one of the mics, using the “phase reverse” switch on your mixer or external microphone pre-amp.
For a full-bodied acoustic track, your best choice is a condenser microphone set to cardioid position and suspended about a foot away from the guitar’s 12th fret (rather than directly at the soundhole) in order to keep bass overtones in check.
With the right guitar-mic combination and a little practice, you can often get the tone you’re after right then and there, without any additional tweaking needed. If you find it necessary to sculpt the sound once other parts have been added, a few minor EQ adjustments, or even just slightly shifting the stereo placement of the track using your pan knobs, will often do the trick.
Hardware helpers
While purists may argue that all you really need is a good guitar, amp and mic to get good sound, sometimes an external enhancer or two can make things that much better. If nothing else, be sure your signal chain includes a quality microphone preamp, which can be had as part of a mix console/DAW or as a standalone box. While some models have pre-sets allowing you to color the recorded sound, pros often favor pre’s that just subtly boost and warm the signal, thereby keeping the track more “transparent.”
Also helpful is a basic compressor/limiter, which, like mic pre’s, often come pre-packaged with software/physical consoles or can be inserted from an external unit. Though a “hotter” compression setting can produce some interesting results (such as when applied to acoustic guitar), by and large you’ll only want to limit to the point of avoiding distortion while still maintaining the instrument’s natural sound.


Community
Connect with BMI & Professional Songwriters